Published March 25, 2021 05:14PM
Why it Might be Time to Downsize Your Vegetables
Microgreens prove that great things can come in small packages.
(Photo: ronstik / Shutterstock)
When spinning your wheels in the produce department of supermarkets small and large you may have noticed that there is a trend towards downsizing vegetables. No, we don’t mean there are fewer on display but that immature veggies known as microgreens are demanding more shelf space. And rock star chefs just love pulling out the tweezers to garnish their dishes with the vegetable confetti. The itty-bitty leaves also seem to be popping up at farmers’ markets at a hasty pace. So why all the hype? Microgreens might be small in stature but they are big on flavor, nutrition, and visual appeal. Here’s everything you need to know about the dainty veggies.
Microgreens 101
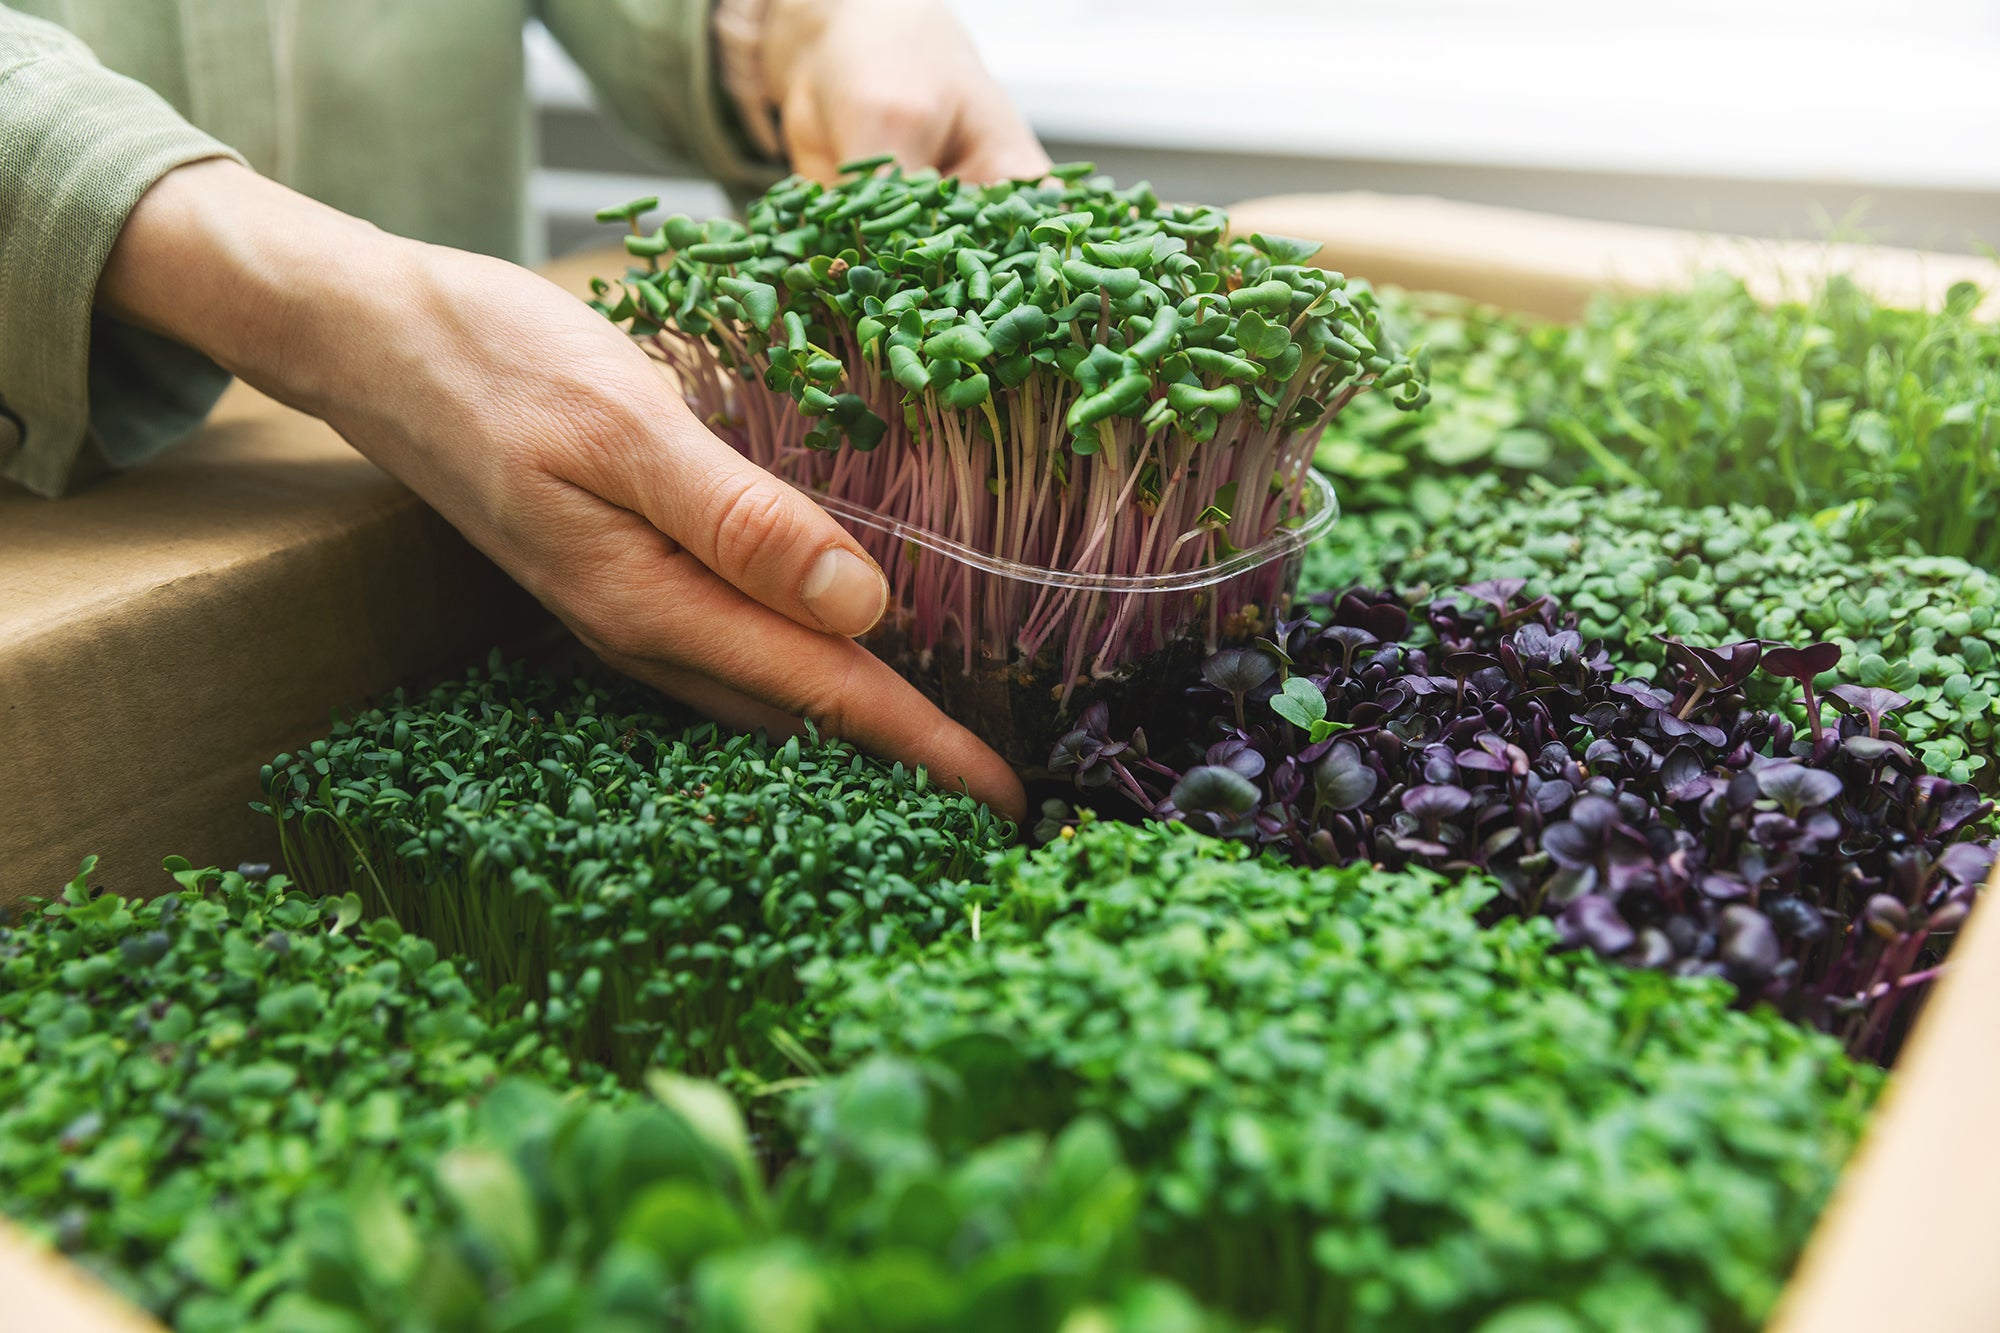
Many people confuse microgreens and sprouts but they are not one and the same. Sprouts are germinated seeds that have cracked open and sent out what looks like little white tails. On the other hand, microgreens are the twee versions of vegetables and herbs – items like radish, kale, basil and red cabbage — that have not yet hit maturity but are at the stage where they have two unfurled seed leaves called cotyledons. Consider them the middle ground between sprouts and mature greens. As with full-blown leafy vegetables, microgreens are harvested above the soil line but when the plant is no taller than a few centimeters, which takes one to three weeks from when the seeds are sown.
How Nutritious are Microgreens?
In short, they punch above their weight nutritionally. Researchers from the U.S. Department of Agriculture found that after testing 25 different varieties of microgreens ounce for ounce options like red cabbage, amaranth and cilantro can be more concentrated in important nutrients including vitamin C, beta-carotene and vitamin K than their grown-up versions. And this study discovered that microgreens including broccoli can offer up useful amounts of carotenoids and vitamin E, both of which act as antioxidants to help safeguard us against free radical cell damage. And you may have heard that very mini broccoli is rife with sulforaphane, a potent cancer-battling compound. (More technically, when you chomp on broccoli sprouts you activate an enzyme called myrosinase that converts the compound glucoraphanin in the broccoli sprouts into sulforaphane. There is your chemistry lesson for the day.) Pea shoots are loaded with bone-benefiting vitamin K and according to a study published in The FASEB Journal, consumption of red cabbage microgreens may lower your risk of cardiovascular disease by improving blood lipid numbers such as triglycerides and LDL cholesterol.
So, since microgreens have higher levels of nutrients and antioxidants than mature vegetables per ounce you might be able to eat a smaller volume but get the same nutritional benefit. Great for anyone who does not love grinding through a big bowl of salad.
Why are microgreens nutritional giants? Because they are harvested when the plants are not yet mature they’re plush in the nutrients and antioxidants needed to grow into full-blown plants. Of course, the exact nutrition of a plant will vary based on factors like growing conditions and length between harvest and consumption. But it’s a safe bet to say when you eat the little guys the nutritional payoff is big.
Now, we are not suggesting you bid adieu to regular broccoli and radishes in favor of a shopping cart full of microgreens. It would be a challenge — not to mention crazy expensive if not growing your own – to get all your vegetable nutrition solely from microgreens. It’s best to view them as an ultra-nutritious complement to the mature veggies you are already (or should be!) eating.
ADVERTISEMENT
Related: 3 Ways to Add More Color to Your Plate
How to Eat Microgreens
A survey in the Journal of Food Science suggests that many consumers are intrigued by the flavors and appearance of microgreens and would be interested in including them more often in their meals. Luckily, micro-veggies seem to know no boundaries in the kitchen and as tiny as they are, these baby plants deliver intense flavors, vibrant colors, and unique textures. Radish and mustard microgreens add a fiery punch; arugula will wake up taste buds with a peppery kick, and pea shoots taste like the freshest sun-kissed peas imaginable. And the fresh crunch of sunflower pee-wee greens is a game-changer.
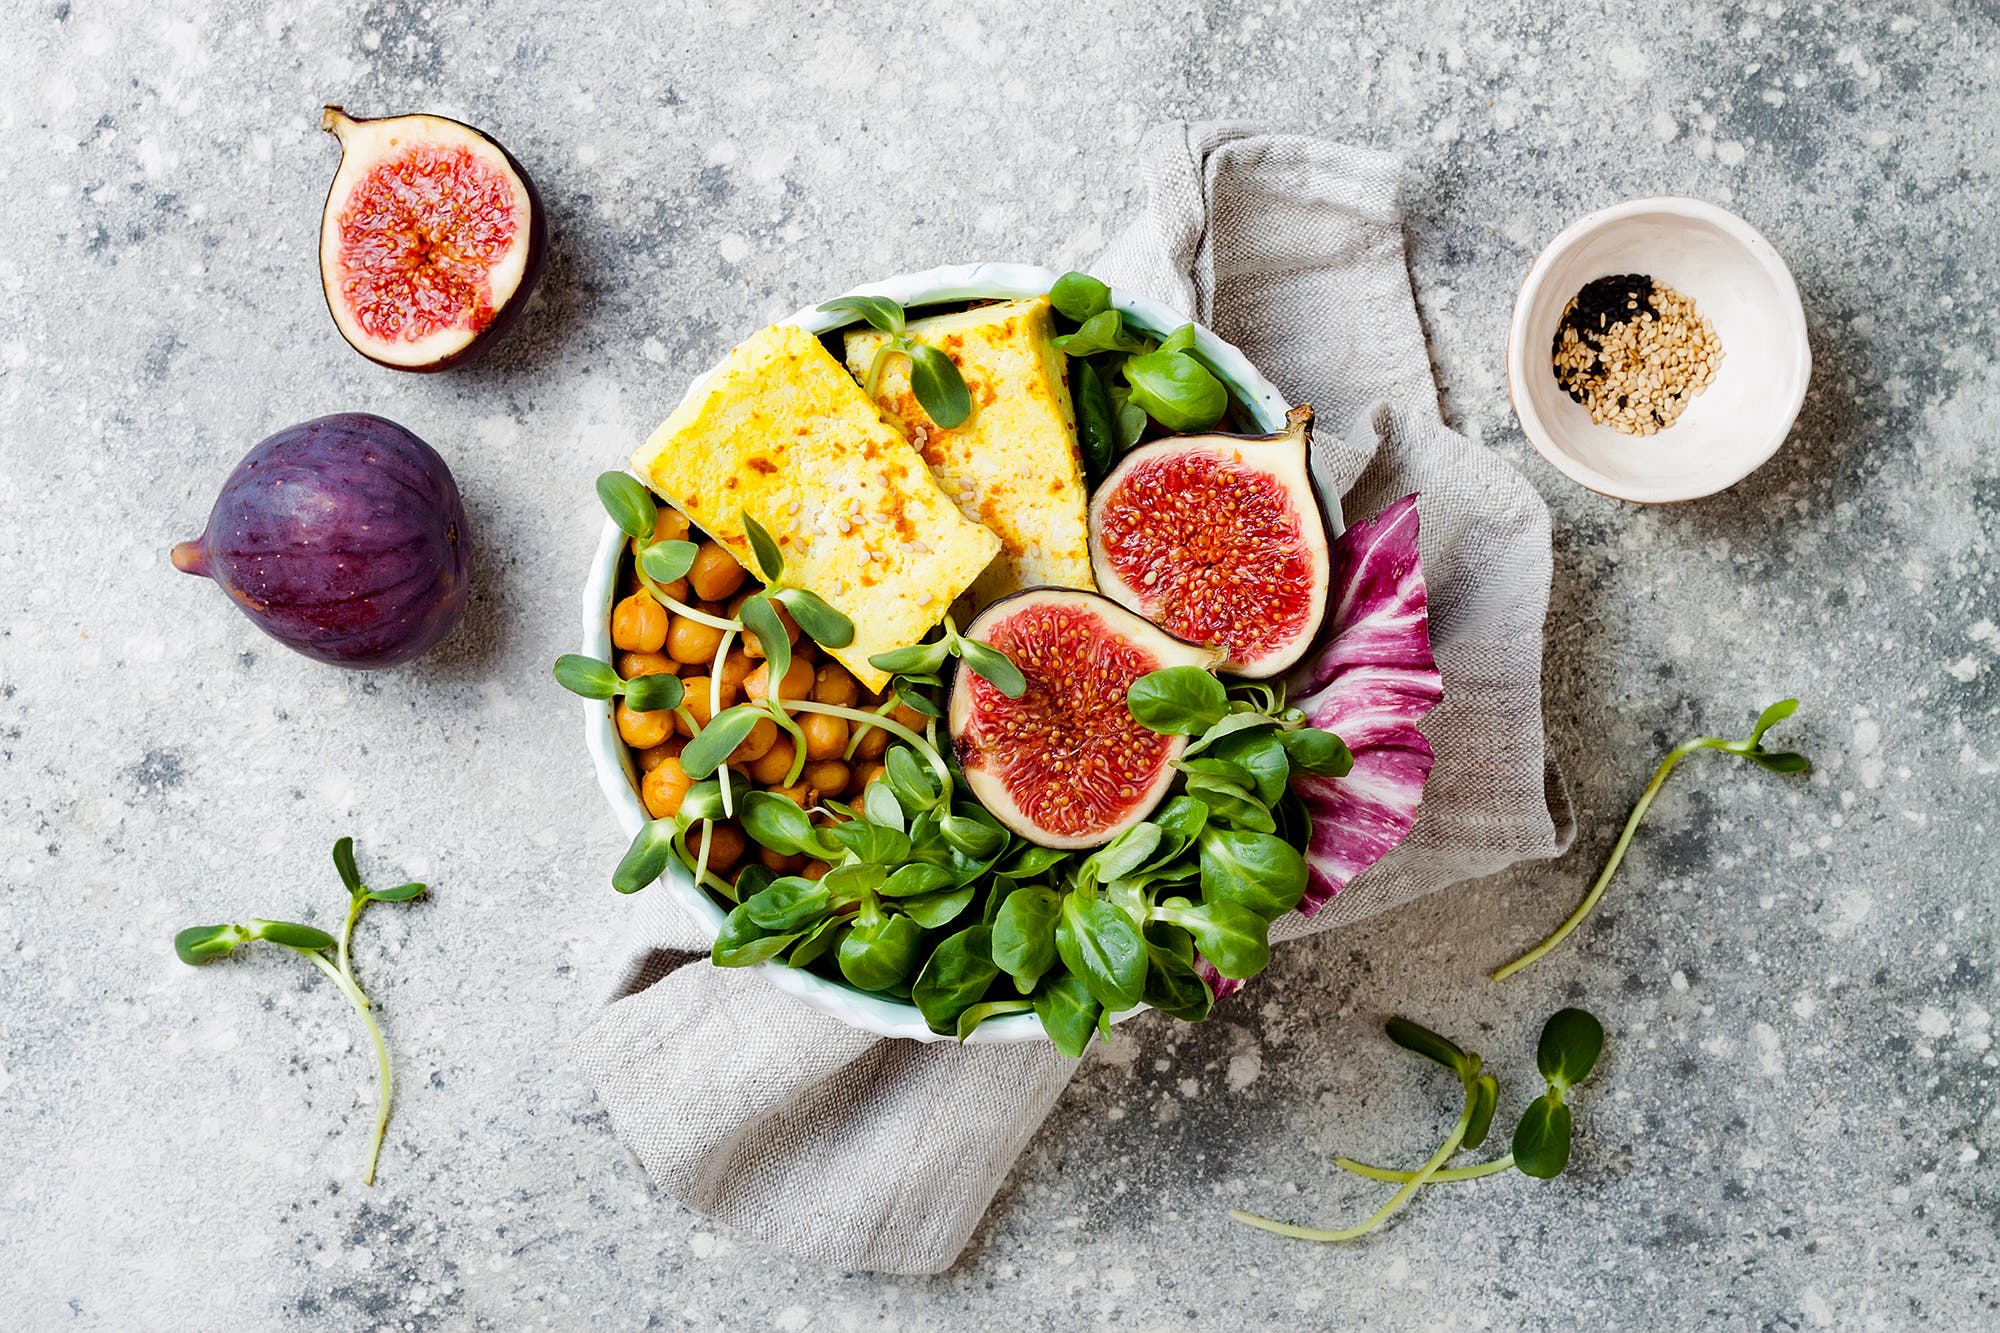
There is no better place to start than harnessing their power as a palate-awakening garnish for sandwiches, soups, grain bowls, tacos, and veggie burgers. If you have enough of them an entire microgreen salad may come just a little short of changing your life. They are great in pesto and blended into so-called “green smoothies.”
ADVERTISEMENT
Microgreens likely carry fewer food safety concerns than sprouts because they are grown in an environment with less moisture and, unlike sprouts, the roots of microgreens are left behind during harvesting. With that said, they still should be rinsed gently before eating. Choose those with lively-looking greens — a sign they were recently harvested and at peak flavor and nutrition. Avoid any that are slimy, which could be a sign of bacterial growth. Don’t dawdle before using them up since the delicate morsels typically have a fleeting shelf-life.
Related: Falafel Buddha Bowls
How to Grow Your Very Own Microgreens
If you want a constant supply of much, much cheaper greens, growing your own plantation of microgreens is nearly foolproof, even if your thumb is more brown than green. You need little more than seeds, soil and a few containers. And they’re a quick-growing project if you are low on patience (hello, kids!). Here’s how to be the ultimate indoor farmer.
Step one: Buy your seeds
Seek out seeds including buckwheat, kale, and radish that are meant specifically for sprouting and microgreen growing. Natural food stores often carry packages of organic sprouting seeds or find a large variety available online.
ADVERTISEMENT
Step two: Find a container
You can use commercial growing trays, but in the spirit of upcycling the clamshell containers that baby greens and strawberries are packaged in can be repurposed for microgreen growing and fit nicely on most windowsills. But the breadth of container options is nearly limitless; nearly anything from ceramic bowls to Pyrex baking dishes to wicker baskets that will hold at least 1-inch of soil will do the trick. Since only light watering is needed, drainage holes are not necessary.
Step three: Soak seeds
Except for gelatinous types of seeds such as cress and chia, you want to cover seeds in water and let soak for 8 to 24 hours. This wakes them up to encourage speedier germination. Start with about 1 teaspoon of smaller seeds such as kale and broccoli, and 1 tablespoon of larger seeds like pea and sunflower.
Step four: Scatter your seeds
Fill your planting container with organic potting mix or compost mixed with a little vermiculite so that it comes up to about 1-inch from the top. Using a shallow container will help you save on soil usage. Do not use soil taken from an outdoor garden. Run the container under your tap so the soil is moist throughout. Microgreens do best in loose soil, so do not pack it down into a brick. Drain and rinse your soaked seeds in a fine-mesh sieve and then spread them out on top of the pre-moistened soil in a single layer. For small seeds like broccoli and kale, use the back of a spoon to help spread them out on the soil. Microgreen seeds can be planted much more densely than outdoor vegetable seeds. So seed heavily to maximize space and consider planting seeds every few days so you have a constant supply allowing for their liberal use in recipes.
ADVERTISEMENT
Step five: Cover up
Cover the seeds with a damp paper towel or dish towel and then place the container in a dark, warm area of your house to allow for germination. During the cooler months, placing a lid over the container can help keep in warmth and moisture. Covering the seeds with more soil can lead to uneven germination. Remoisten the towel as needed and occasionally touch the soil to make sure it’s still moist. If not, spritz with a bit more water.
Step six: Let the light shine
Once you see evidence of seed leaves and the stems are about ½ to 1-inch long, about 3 to 4 days, remove the covering and place the container in a well-lit area like a sunny windowsill with good air circulation.
Step seven: Nurture your garden
Lightly water once daily at soil level just to the point where the soil is moist like a damp sponge. Watering from above can damage the delicate leaves and stems, while overwatering can lead to rotting roots. Don’t mistake the fuzzy white stuff on the roots for mold. Instead, it’s harmless tiny root hairs.
ADVERTISEMENT
Step eight: Harvest the fruits of your (easy) labor
When the first two small leaves (called cotyledons) have unfurled and the stems are 3 to 7 inches long, your tiny forest is ready to harvest. Simply cut away as many plants as you need slightly above the soil line with kitchen shears. For optimal freshness and nutrition, cut the greens only shortly before use. Once the harvest is complete, compost the soil and wash the container for another planting.
Micro Management
These items can help you welcome the jolly green microgreen giant into your life.
- Year-Round Indoor Salad Gardening: How to Grow Nutrient-Dense, Soil-Sprouted Greens in Less Than 10 Days. The ultimate resource for guiding you on how to turn your house into a field of green.
- Upward Farms Microgreens. Nutrient-dense microgreen mixes that can instantly upgrade your lunch sandwich.
- Sprout People. A huge collection of seeds for your DIY microgreen project.