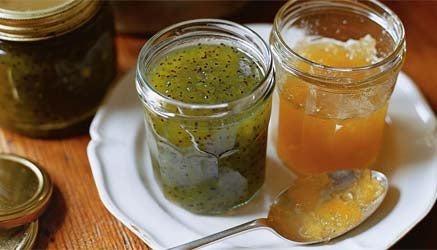
Jam Session

Small wonder artisanal jams are all the rage these days. The decorative jars contain preserves made with little batches of perfectly ripe fruit, meaning they have a naturally sweet taste you can’t get from mass-produced spreads. So why not make them in your own kitchen? Early autumn, when temperatures are cooler, fall fruits are at their best, and the holiday season is fast approaching (homemade preserves make lovely gifts), is an ideal time to try your hand. We’ve put together a collection of simple, foolproof recipes that let the flavors of the fruit shine through. They’re great for first-time jam-makers as well as experienced canners, and the results—a gorgeous green kiwi jam, a spicy pear jam, a chunky fig spread, and a rich apple butter—rival any gourmet offering.
What You’ll Need
You probably already have most of these jam-making basics in your kitchen.
Latex kitchen gloves (to protect your hands from heat and spills)
2 large stockpots
1 canning rack or round cake rack (the diameter of one stockpot)
Spatula or wooden spoon
Ladle
Tongs
Clean, damp towel or sponge
Clean, heat-proof canning jars with new lids
Sterile, sealed, and safe (in 3 easy steps)
For jams that will keep in the cupboard for months and keep out the risk of food-borne illnesses, follow these important steps every time.
1. Sterilize jars and lids: Place jars in a large pot of simmering water and lids in a small pot of simmering water, making sure they remain submerged. Remove pot from heat, but keep the water hot and jars and lids submerged until ready to use. (Alternately, you can heat jars and lids in the dishwasher on the rinse cycle.) Use tongs to remove jars and lids from hot water or hot dishwasher, and shake dry.
2. Seal: Fill sterilized jars with jam, leaving 1/4-inch space from rim at the top (known as headspace). Wipe off any drips from around the edge with a clean, damp towel, then close lids.
3. Process in a boiling water bath: Place a canning rack or cake rack in bottom of large stockpot and fill halfway with water—you can use the same pot and water you sterilized the jars in. Stand filled jars on rack in pot, adding extra water if necessary to be sure jars are covered by 1 inch. Bring water to a rolling boil, and boil jars in water 10 minutes. Remove jars with tongs and cool before labeling and storing.
Easy Kiwi Jam (pictured)
Ginger-Pear Jam (pictured)